Build a Turkey Cut-Out Craft
The Build a Turkey Cut-Out Craft is a fun and creative activity that lets kids design their very own Thanksgiving turkey. Children will color the pieces, cut them out, and glue them together to make a colorful turkey they can proudly display. This project encourages imagination while helping kids practice their cutting, coloring, and following-directions skills in a playful, hands-on way.
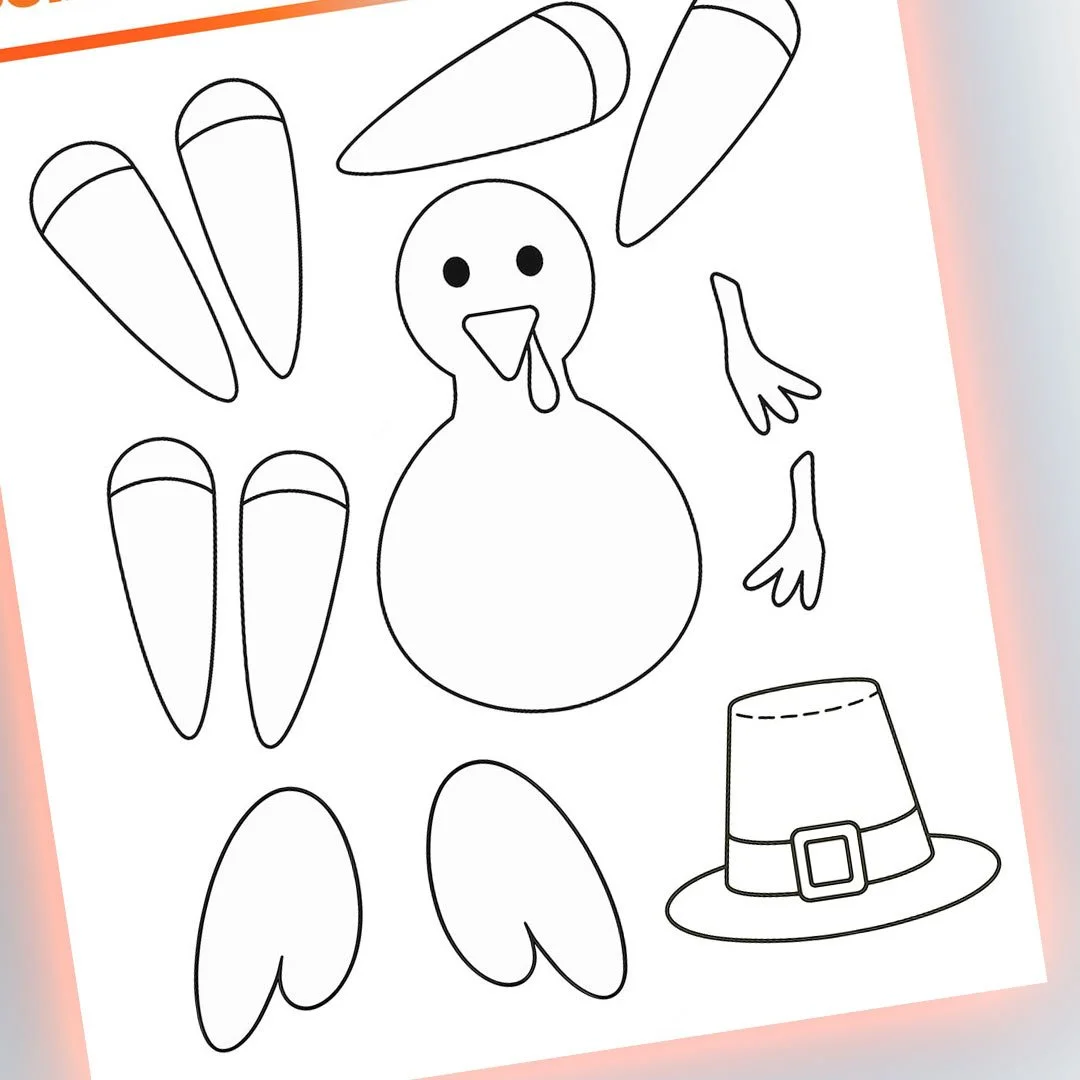
Instructions
1. Color all the turkey parts
Use crayons, markers, or colored pencils to color the body, feathers, wings, feet, hat, and face. Encourage kids to choose fall colors or make creative patterns.
2. Cut out each piece
Carefully cut along the solid outlines. Younger children may need adult help for smaller pieces like the wattle or feet. Spread the pieces out once cut.
3. Add the tail feathers
Arrange the long feather pieces behind the turkey in a fan shape. Layer them slightly for a full turkey tail. Glue them in place.
5. Attach wings and feet
Glue the two wings to the sides of the body, then glue the feet at the bottom.
6. Add the hat
Glue the pilgrim hat on top of the turkey’s head to finish the craft.
7. Let it dry & display
Hang up the finished turkey on a wall, fridge, bulletin board, or classroom display.